Points of Interest (POIs) are a great way for you to recommend the best places for your clients to visit on their trip. Whether it’s the most delicious local restaurant, hidden treasures off the beaten track, the best Instagram spot or the nearest ATM, POIs will enhance your client’s trip and enable them to get the most out of each location.
Points of Interest are set at a company level so your POIs will appear on all of your client’s maps that fall in range, and you only have to set them once (though you can add to or update them whenever you like).
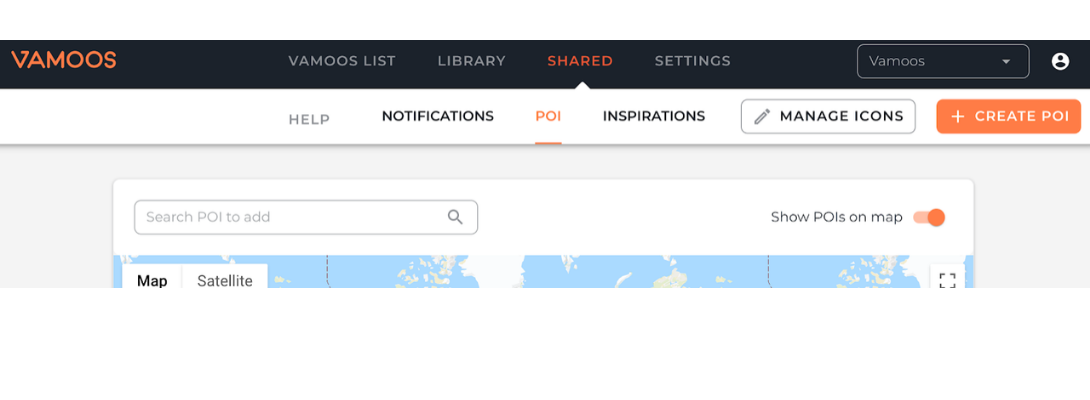
The POI tab is located in the SHARED section of the top navigation bar.
Adding POIs
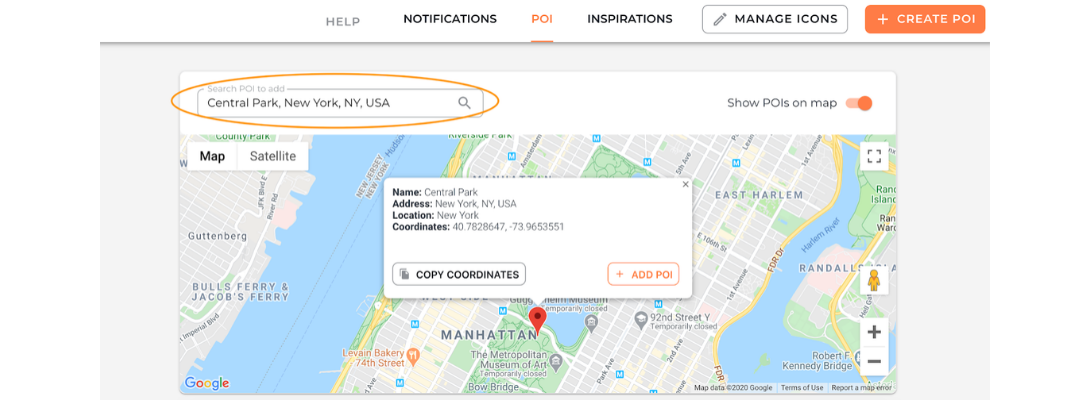
To create a POI, simply search your POI in our integrated maps search bar as you would a Location. Once located, press “Add POI”.
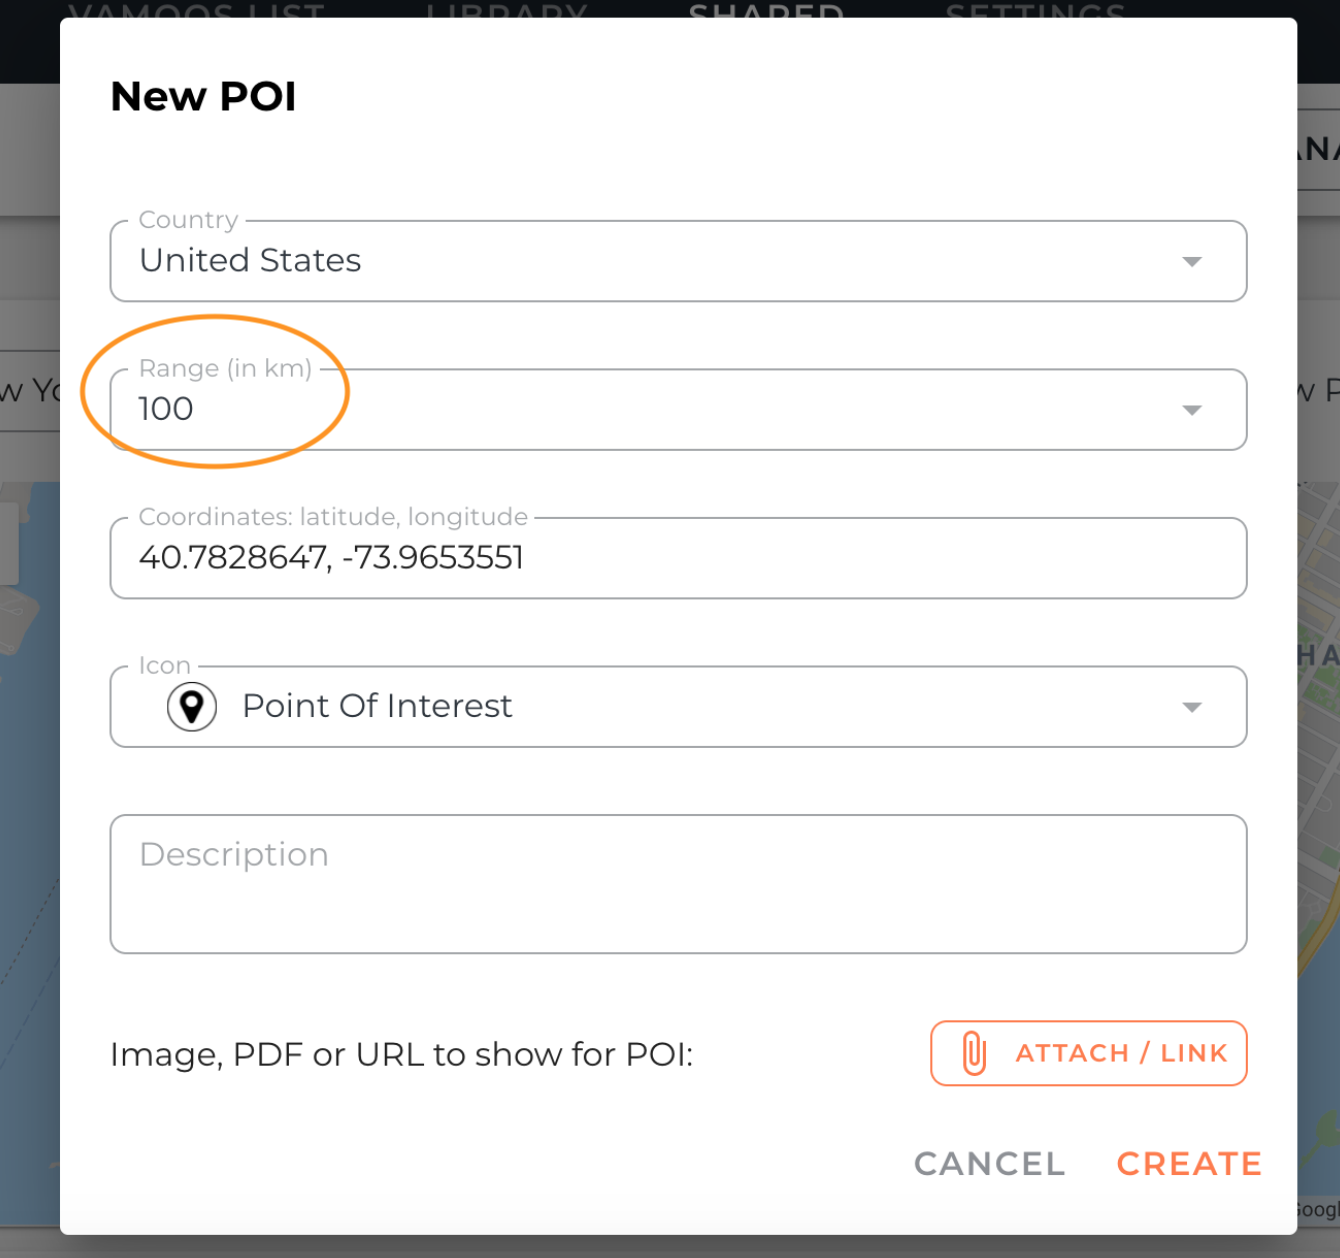
Once added, complete the details for your POI.
Range in KM – This is how far a POI will be discoverable on a client’s map from their location.
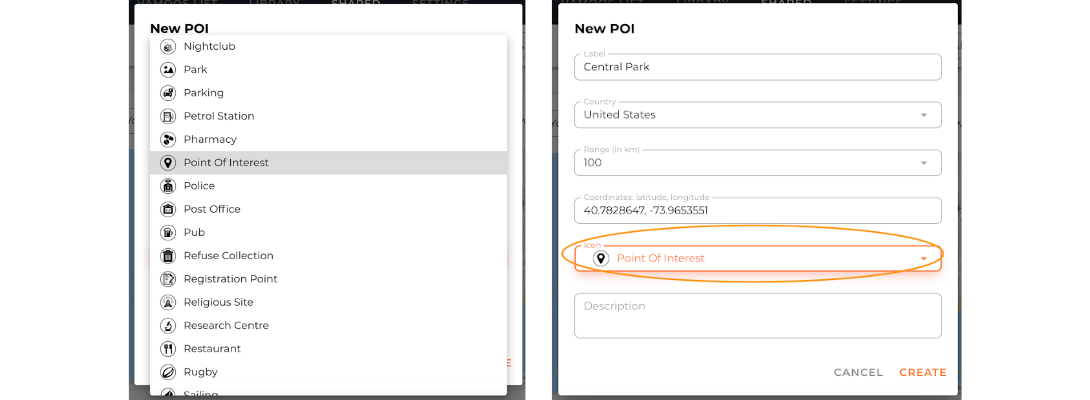
Icon – this is the symbol your client will see. Make sure the icon is easily identifiable to the POI. Can’t see what you’re looking for? Let us know and we can add this in for you.
Additional Information – Here you can add additional information about your POI. Whether that’s an image or text, an image and text together, a URL link or a PDF document, this is where you can personalise your POIs, adding information your client can’t find anywhere else.
You can now add in a description as well as a link/PDF however this will only show on the preview on the Vamoos List and not on the POI on the maps. Make sure this description is around 10 words long to ensure it can all be seen.
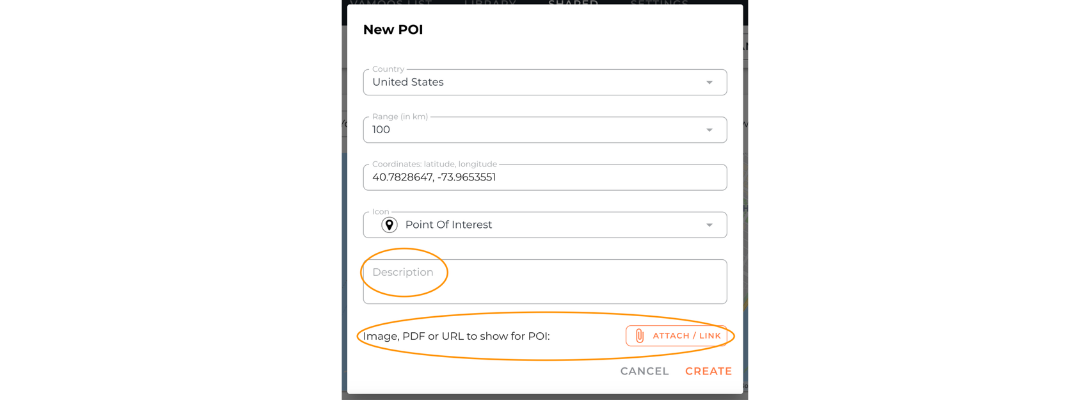
Once you’ve added in your additional information, press “Create”, your POI is now live.
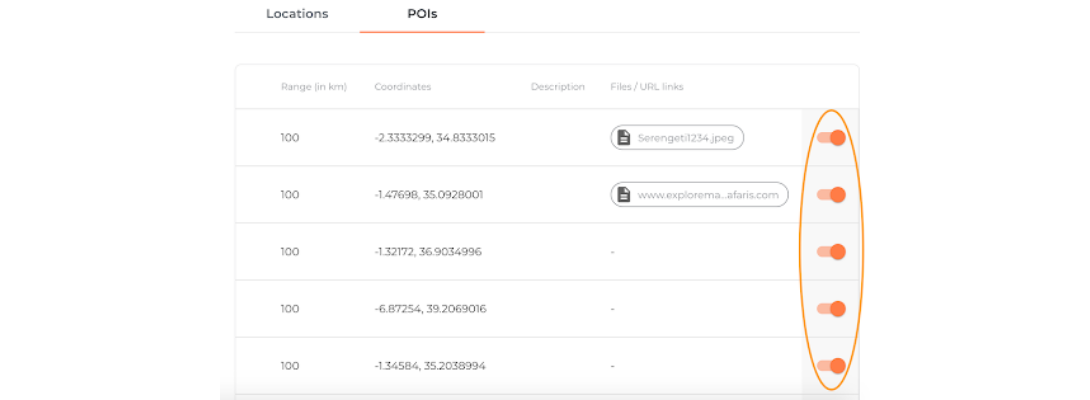
You can turn POIs on and off. You can do this at a company level in SHARED – POI or at an itinerary specific level in LOCATIONS – POIs.
How clients view and search POIs
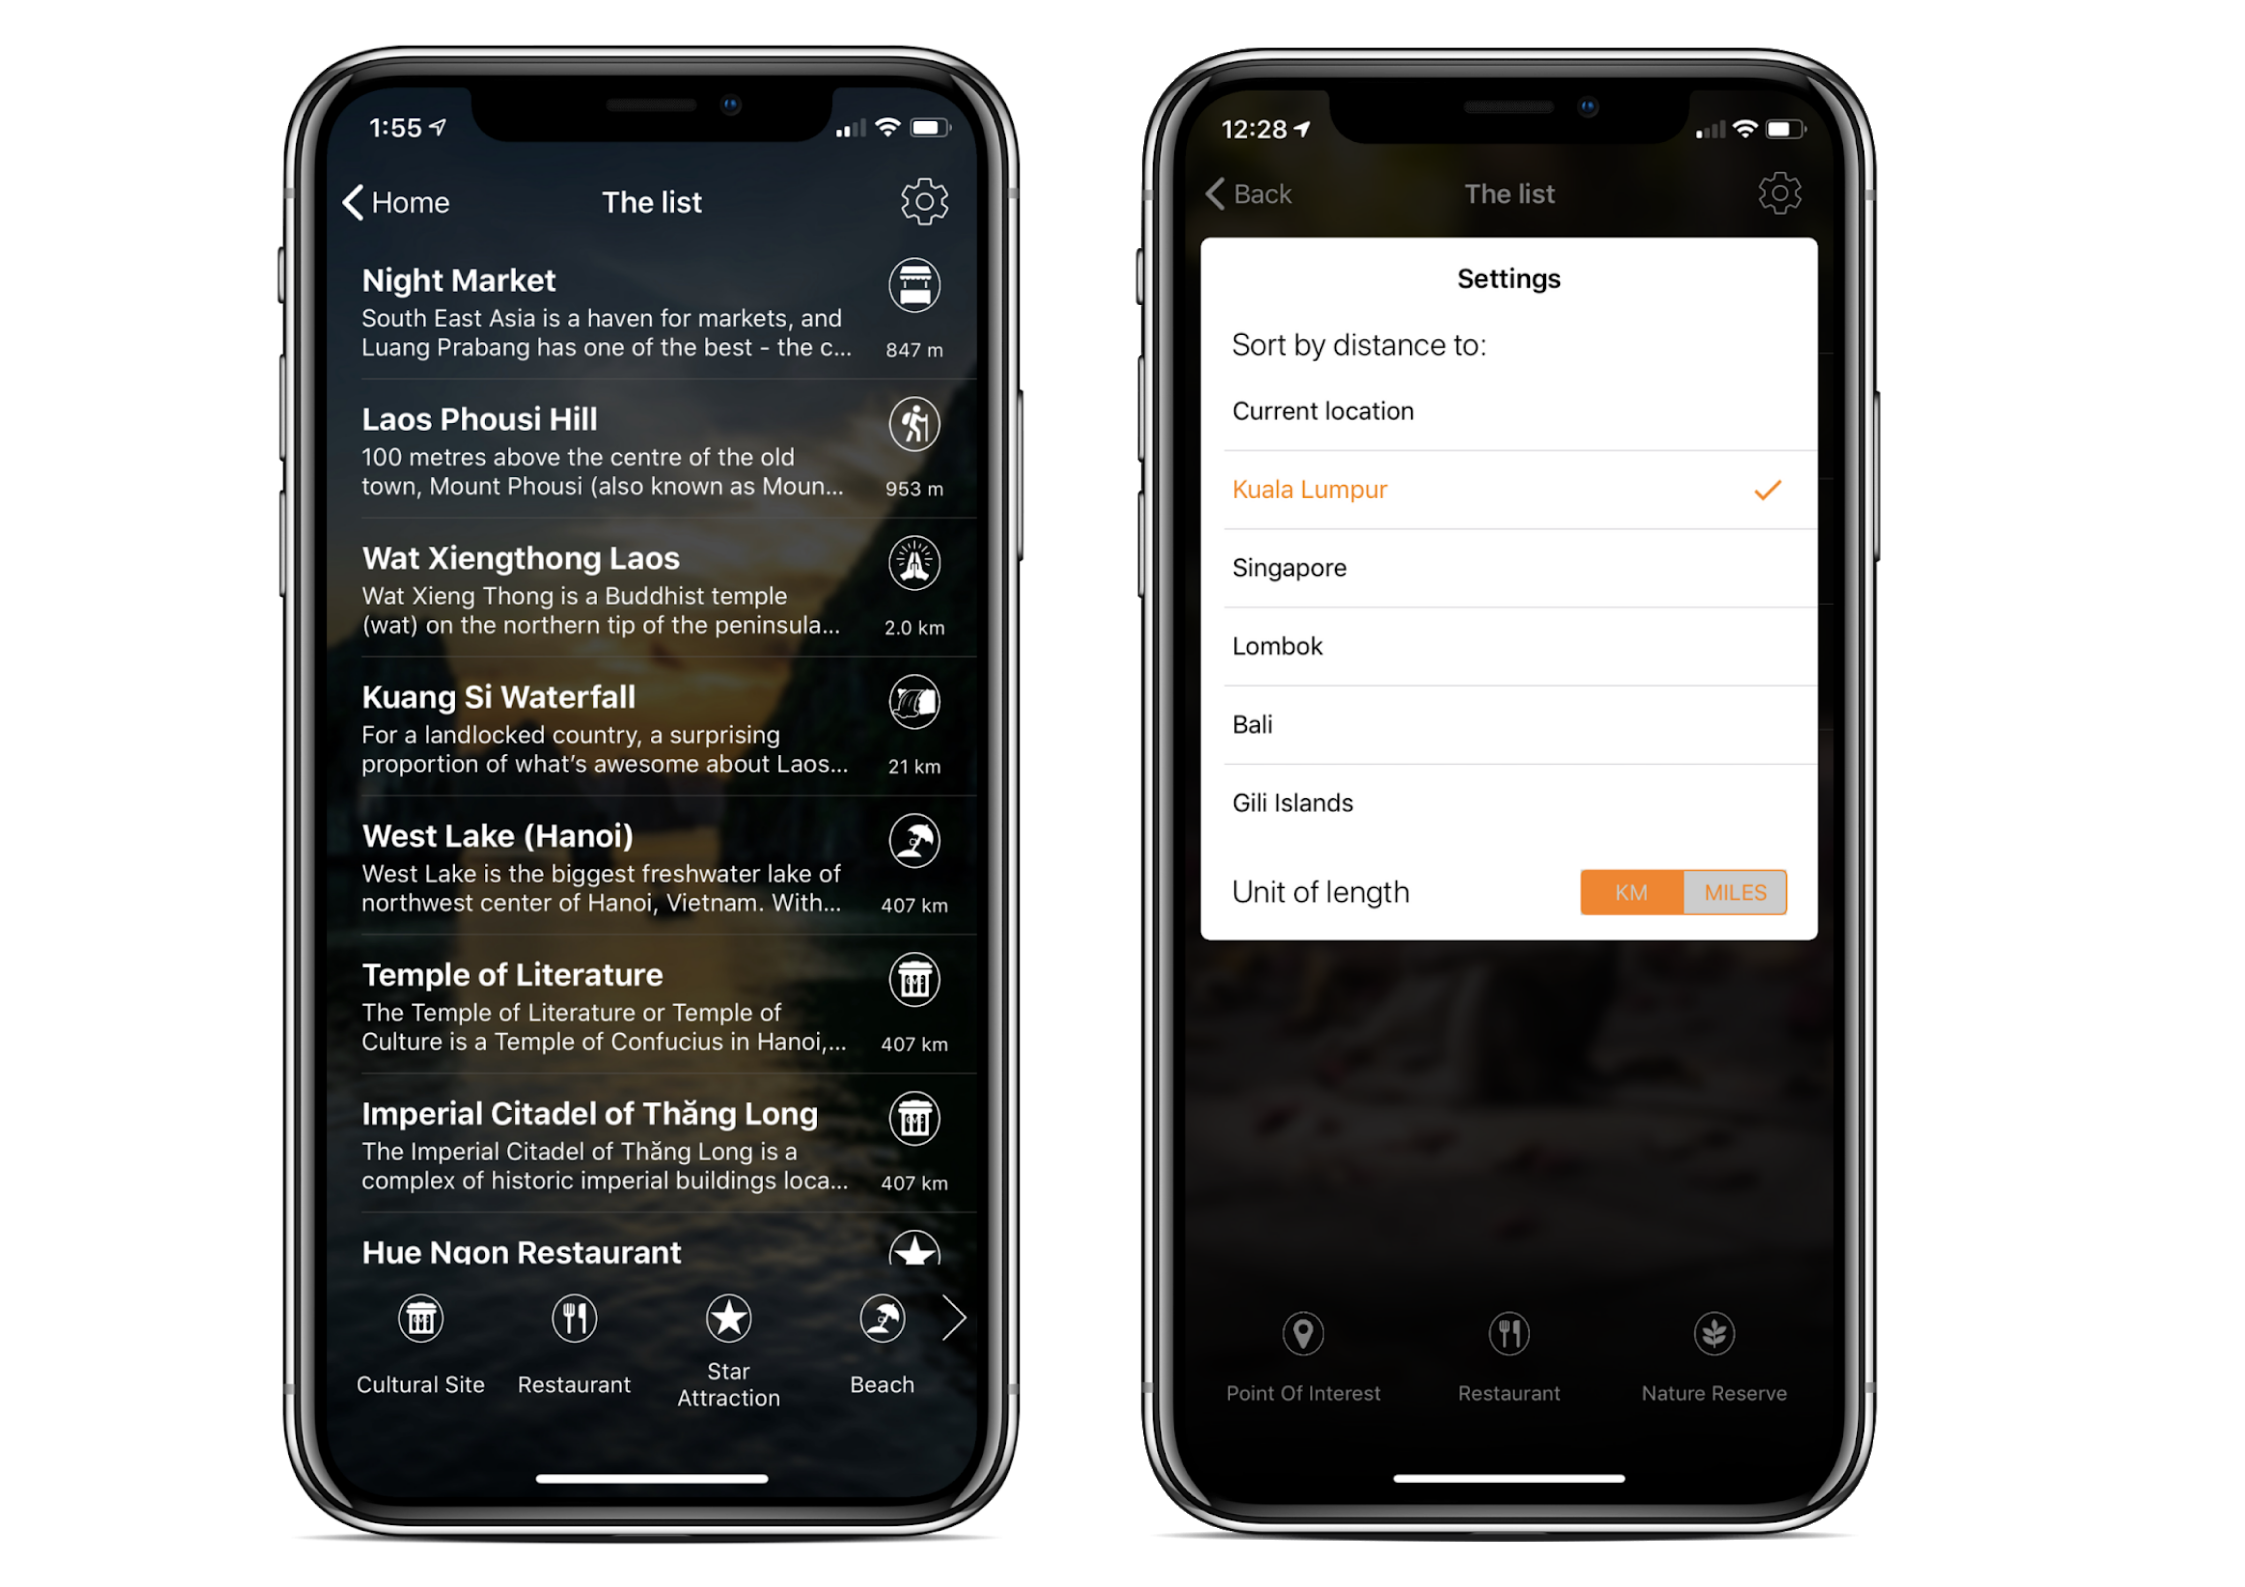
The best way to show your clients their POIs is through THE LIST.
To activate THE LIST, simply ensure the “Enable The List” is turned on in the General section of an itinerary.

Features of The List
The List is accessed via the home screen of the app via the icon.
Viewing POIs through The List allows clients to filter POIs by type but also radius to chosen locations.
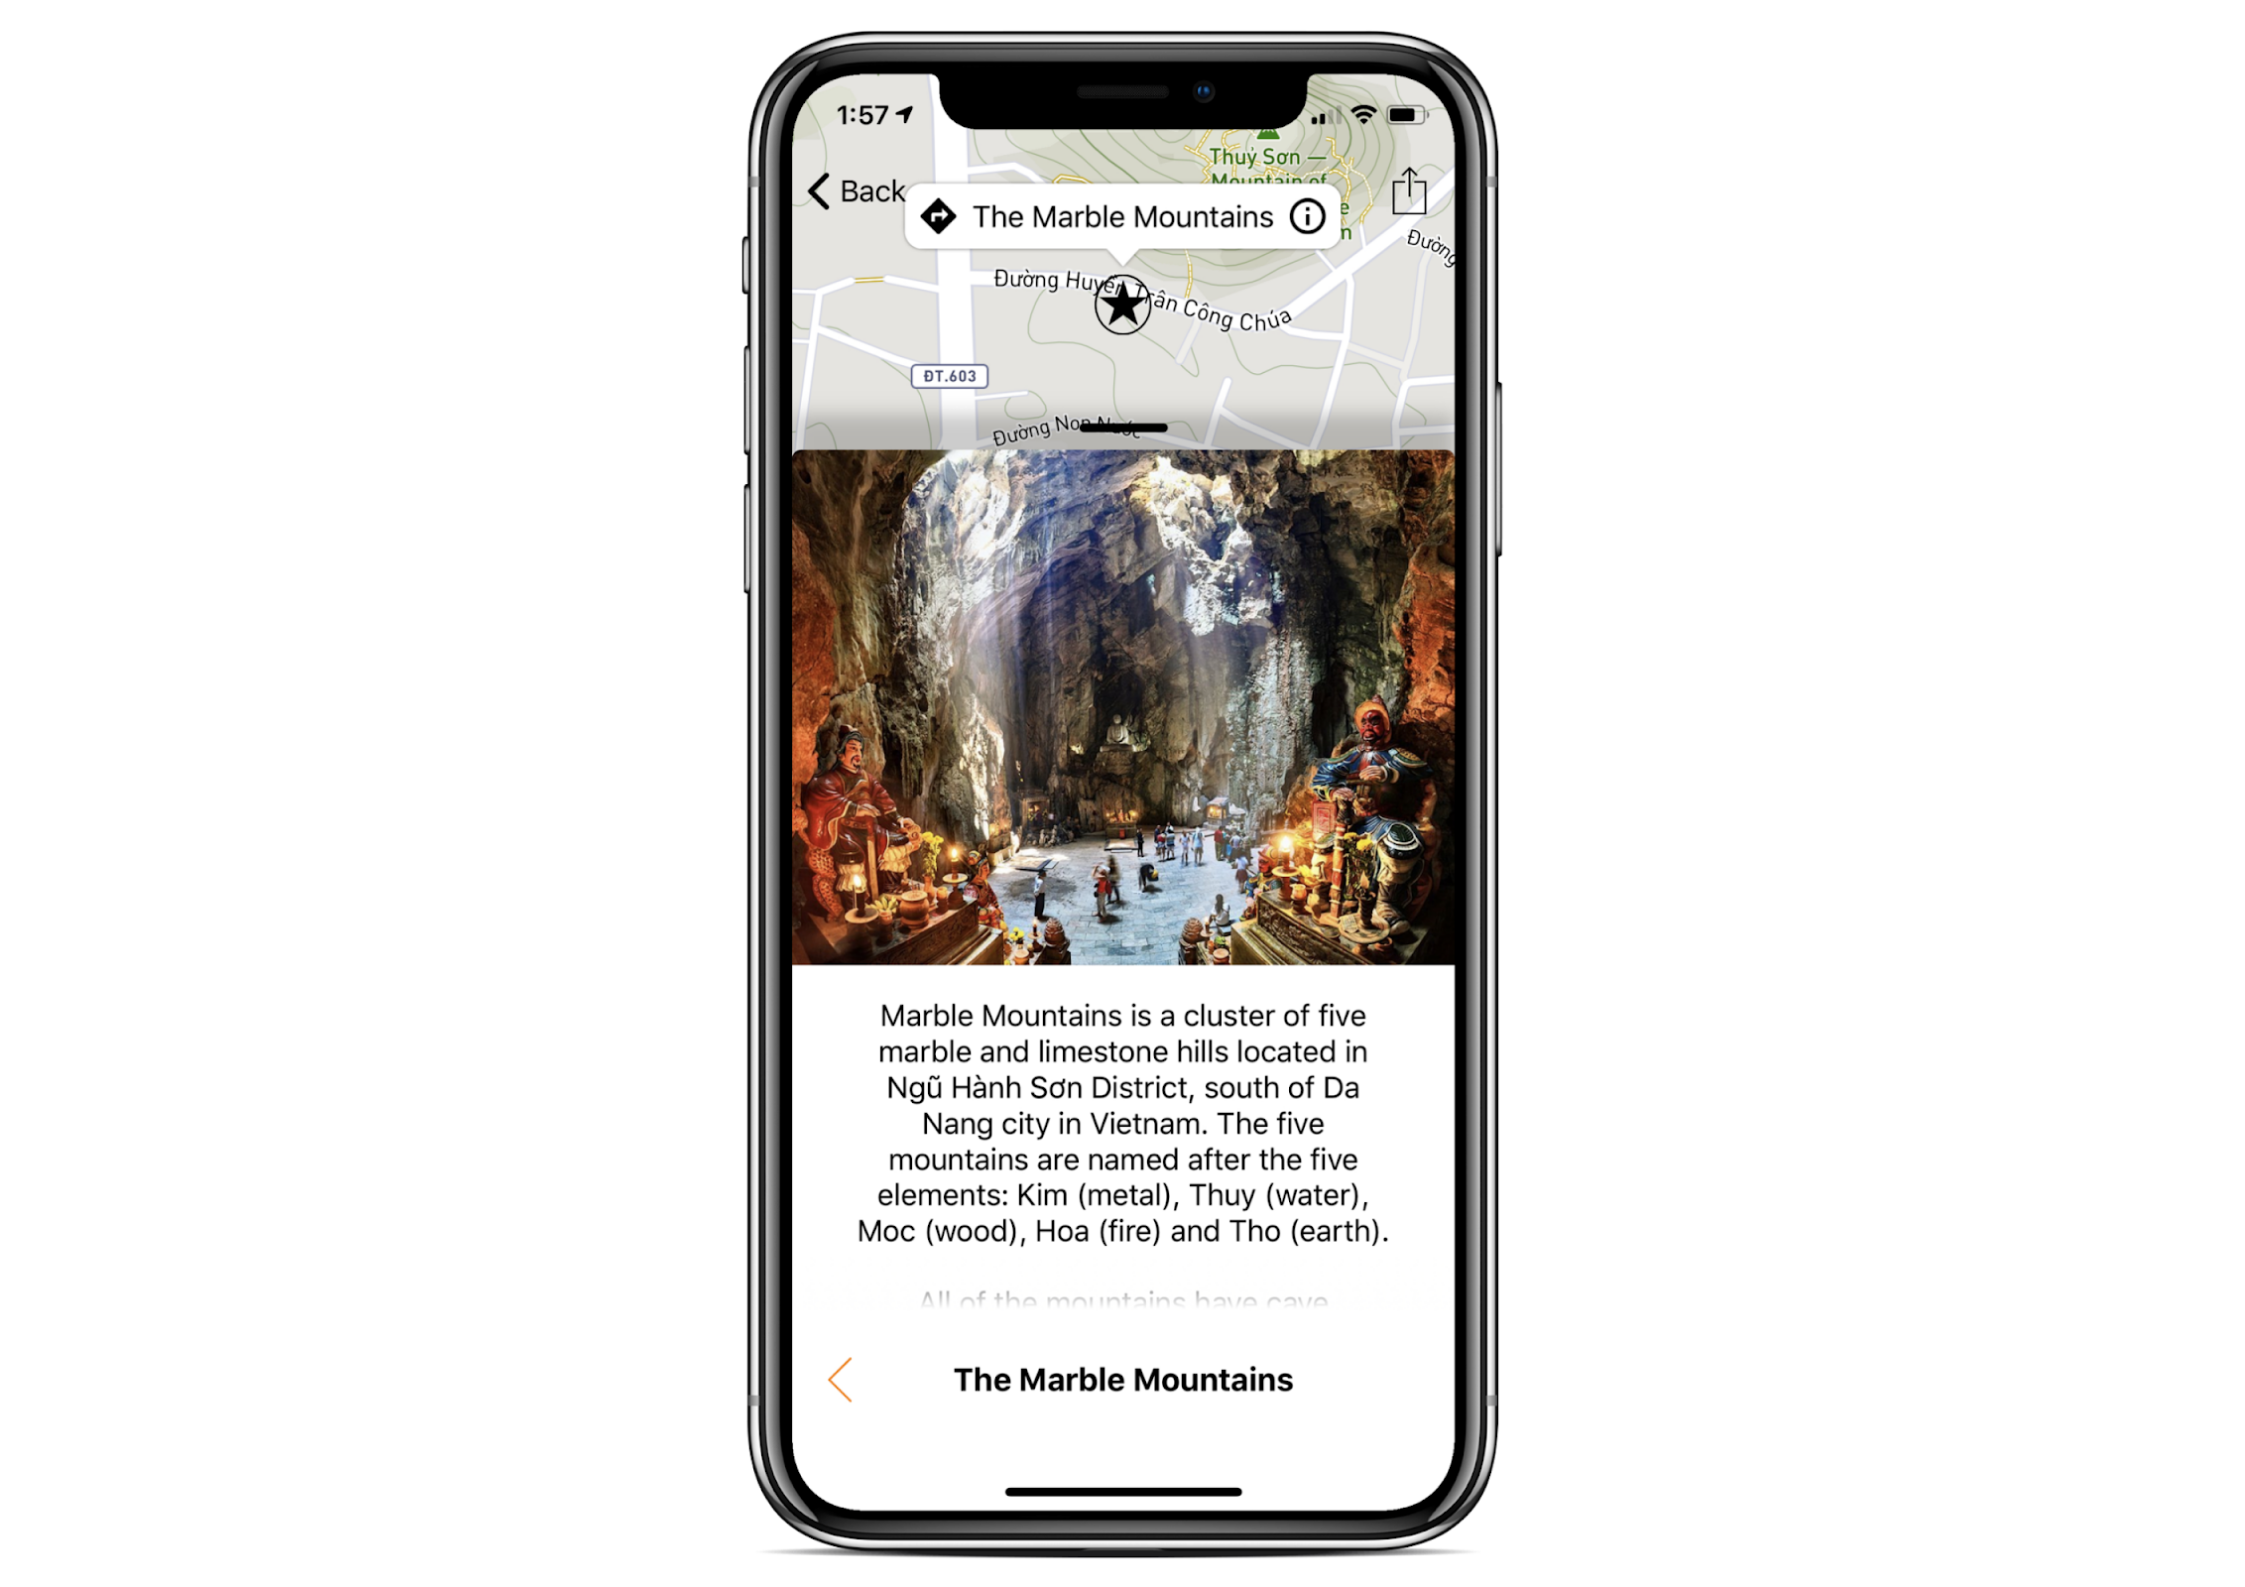
When the specified POI is chosen. The user will be able to see any attached imagery/text or URL you have associated with the POI.
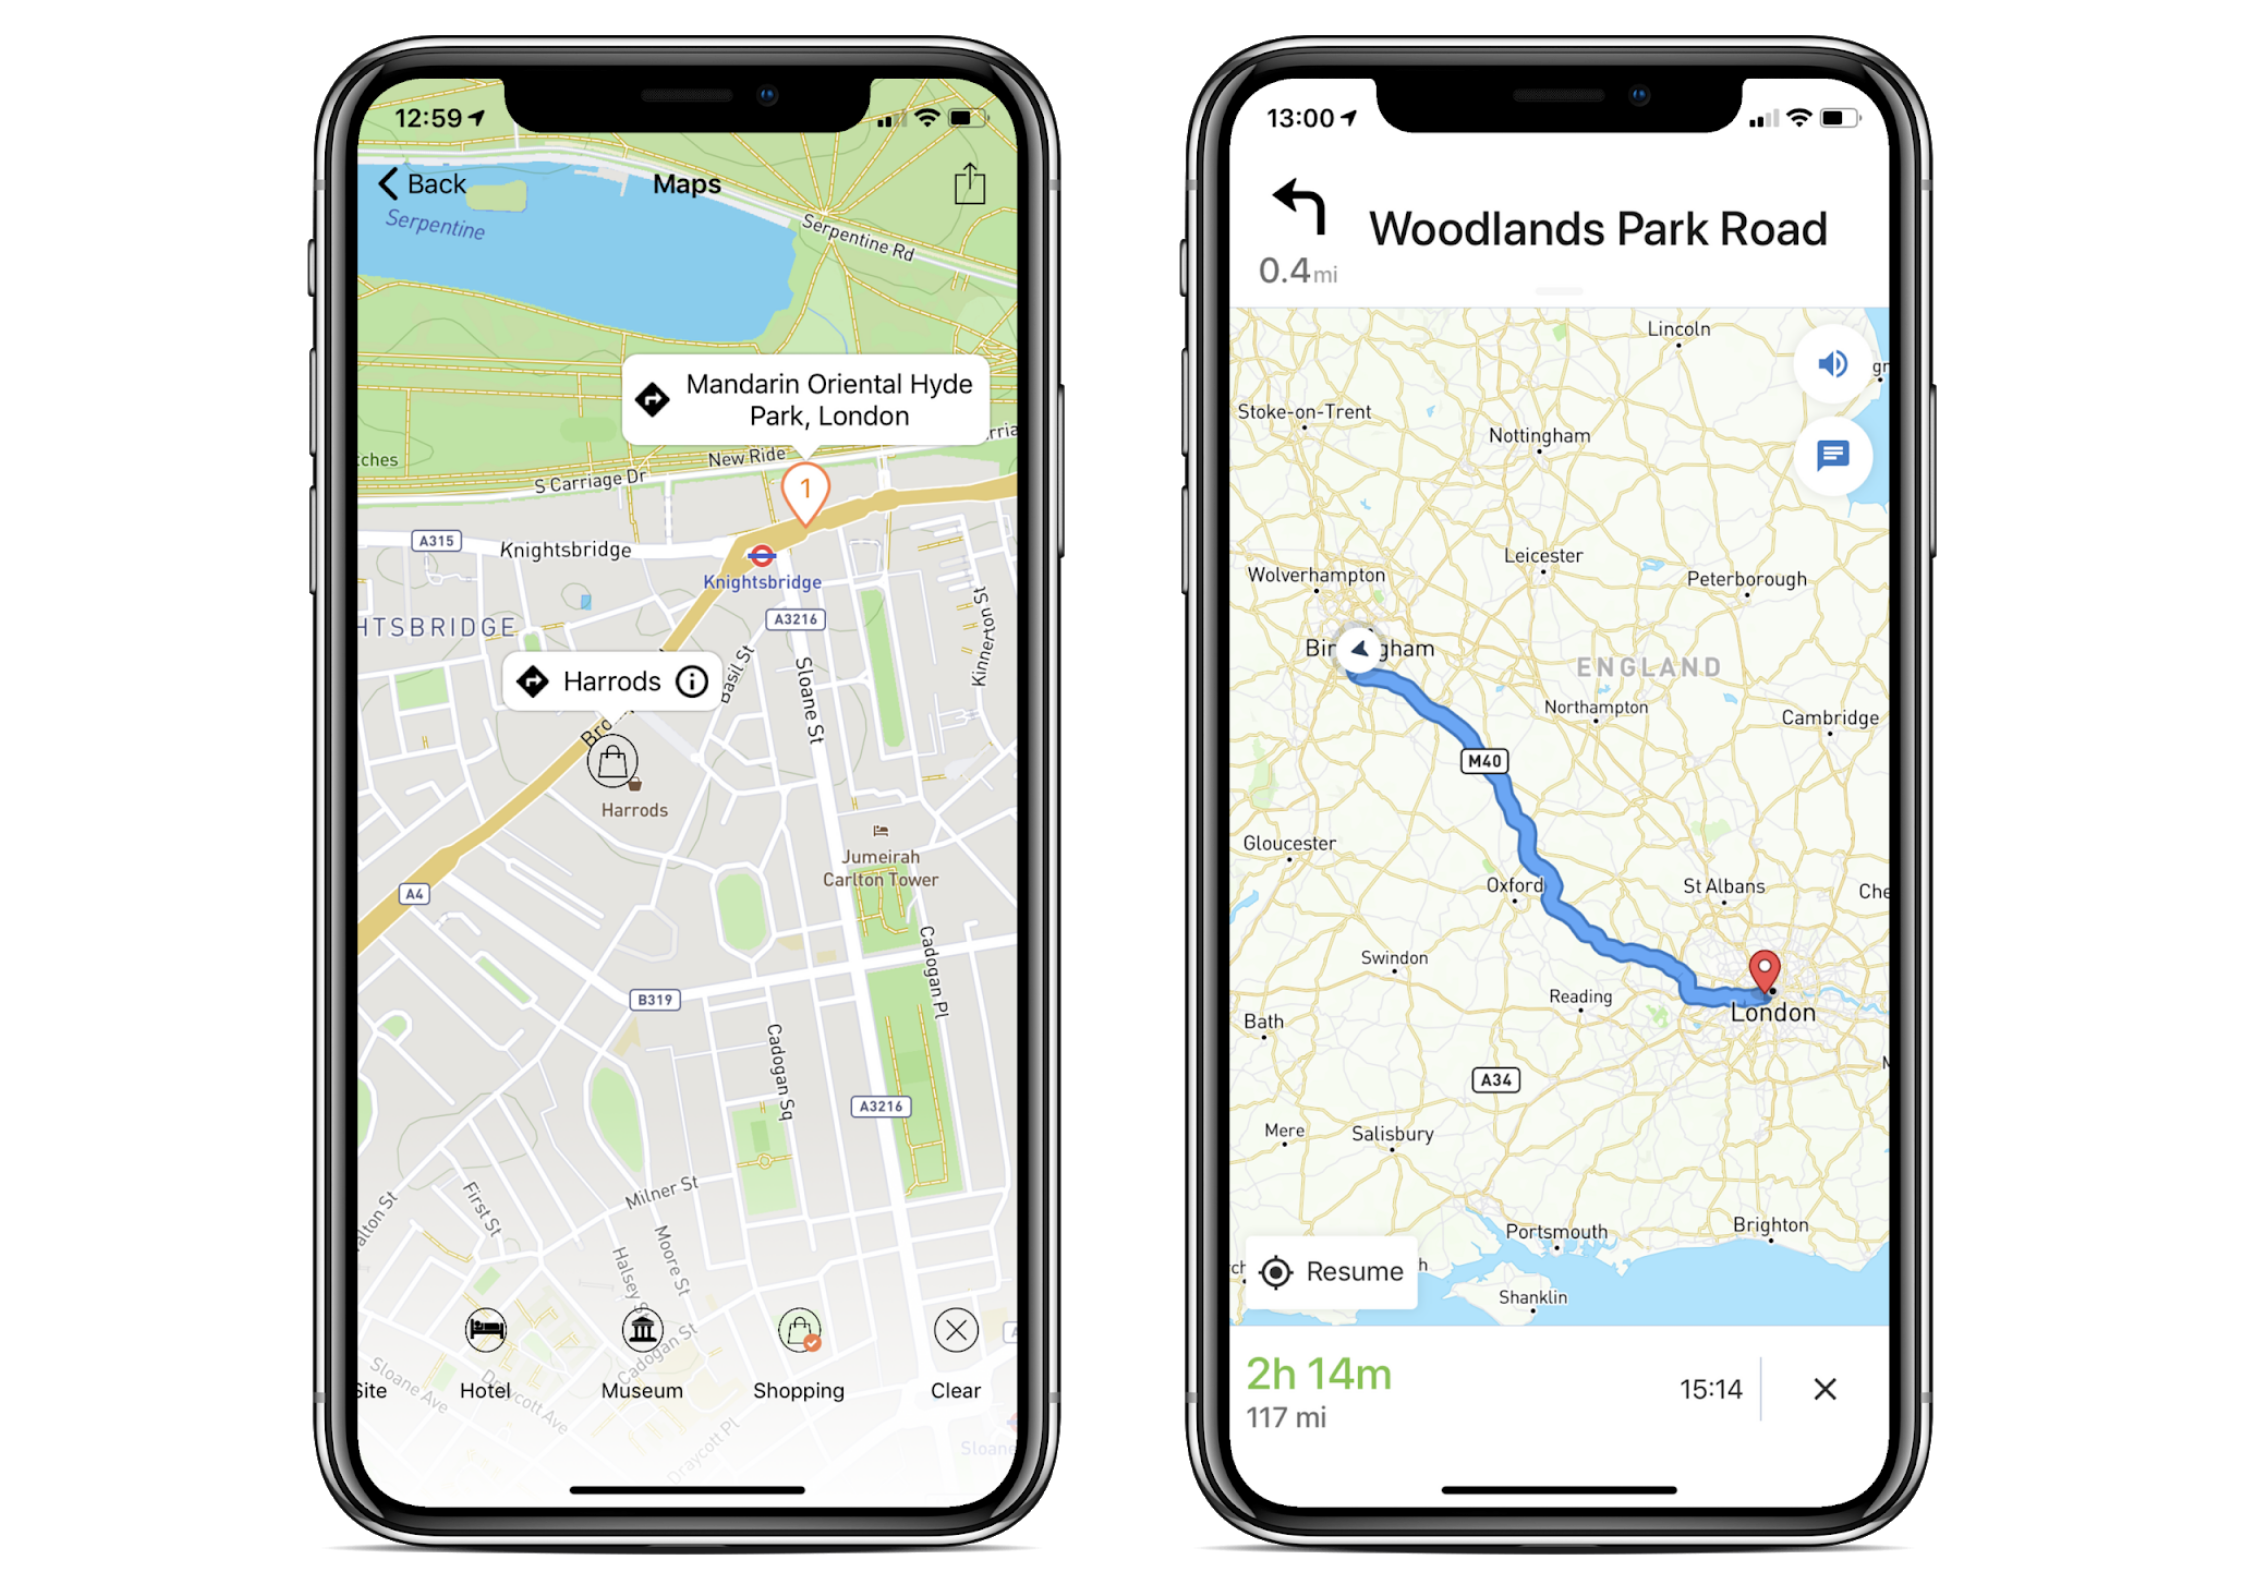
Viewing POIs on Maps
To view all their available POIs within the chosen radius, users simply need to scroll along the carousel of icons at the bottom of the screen. When they tick the POIs they want, the icons will appear on the map.
Users can also select to view the map in Satellite View.
Driving Instructions
When a user clicks on a POI they will see an arrow option and an information button.
The Information Button will navigate the user to any additional information that you have attached to that POI.
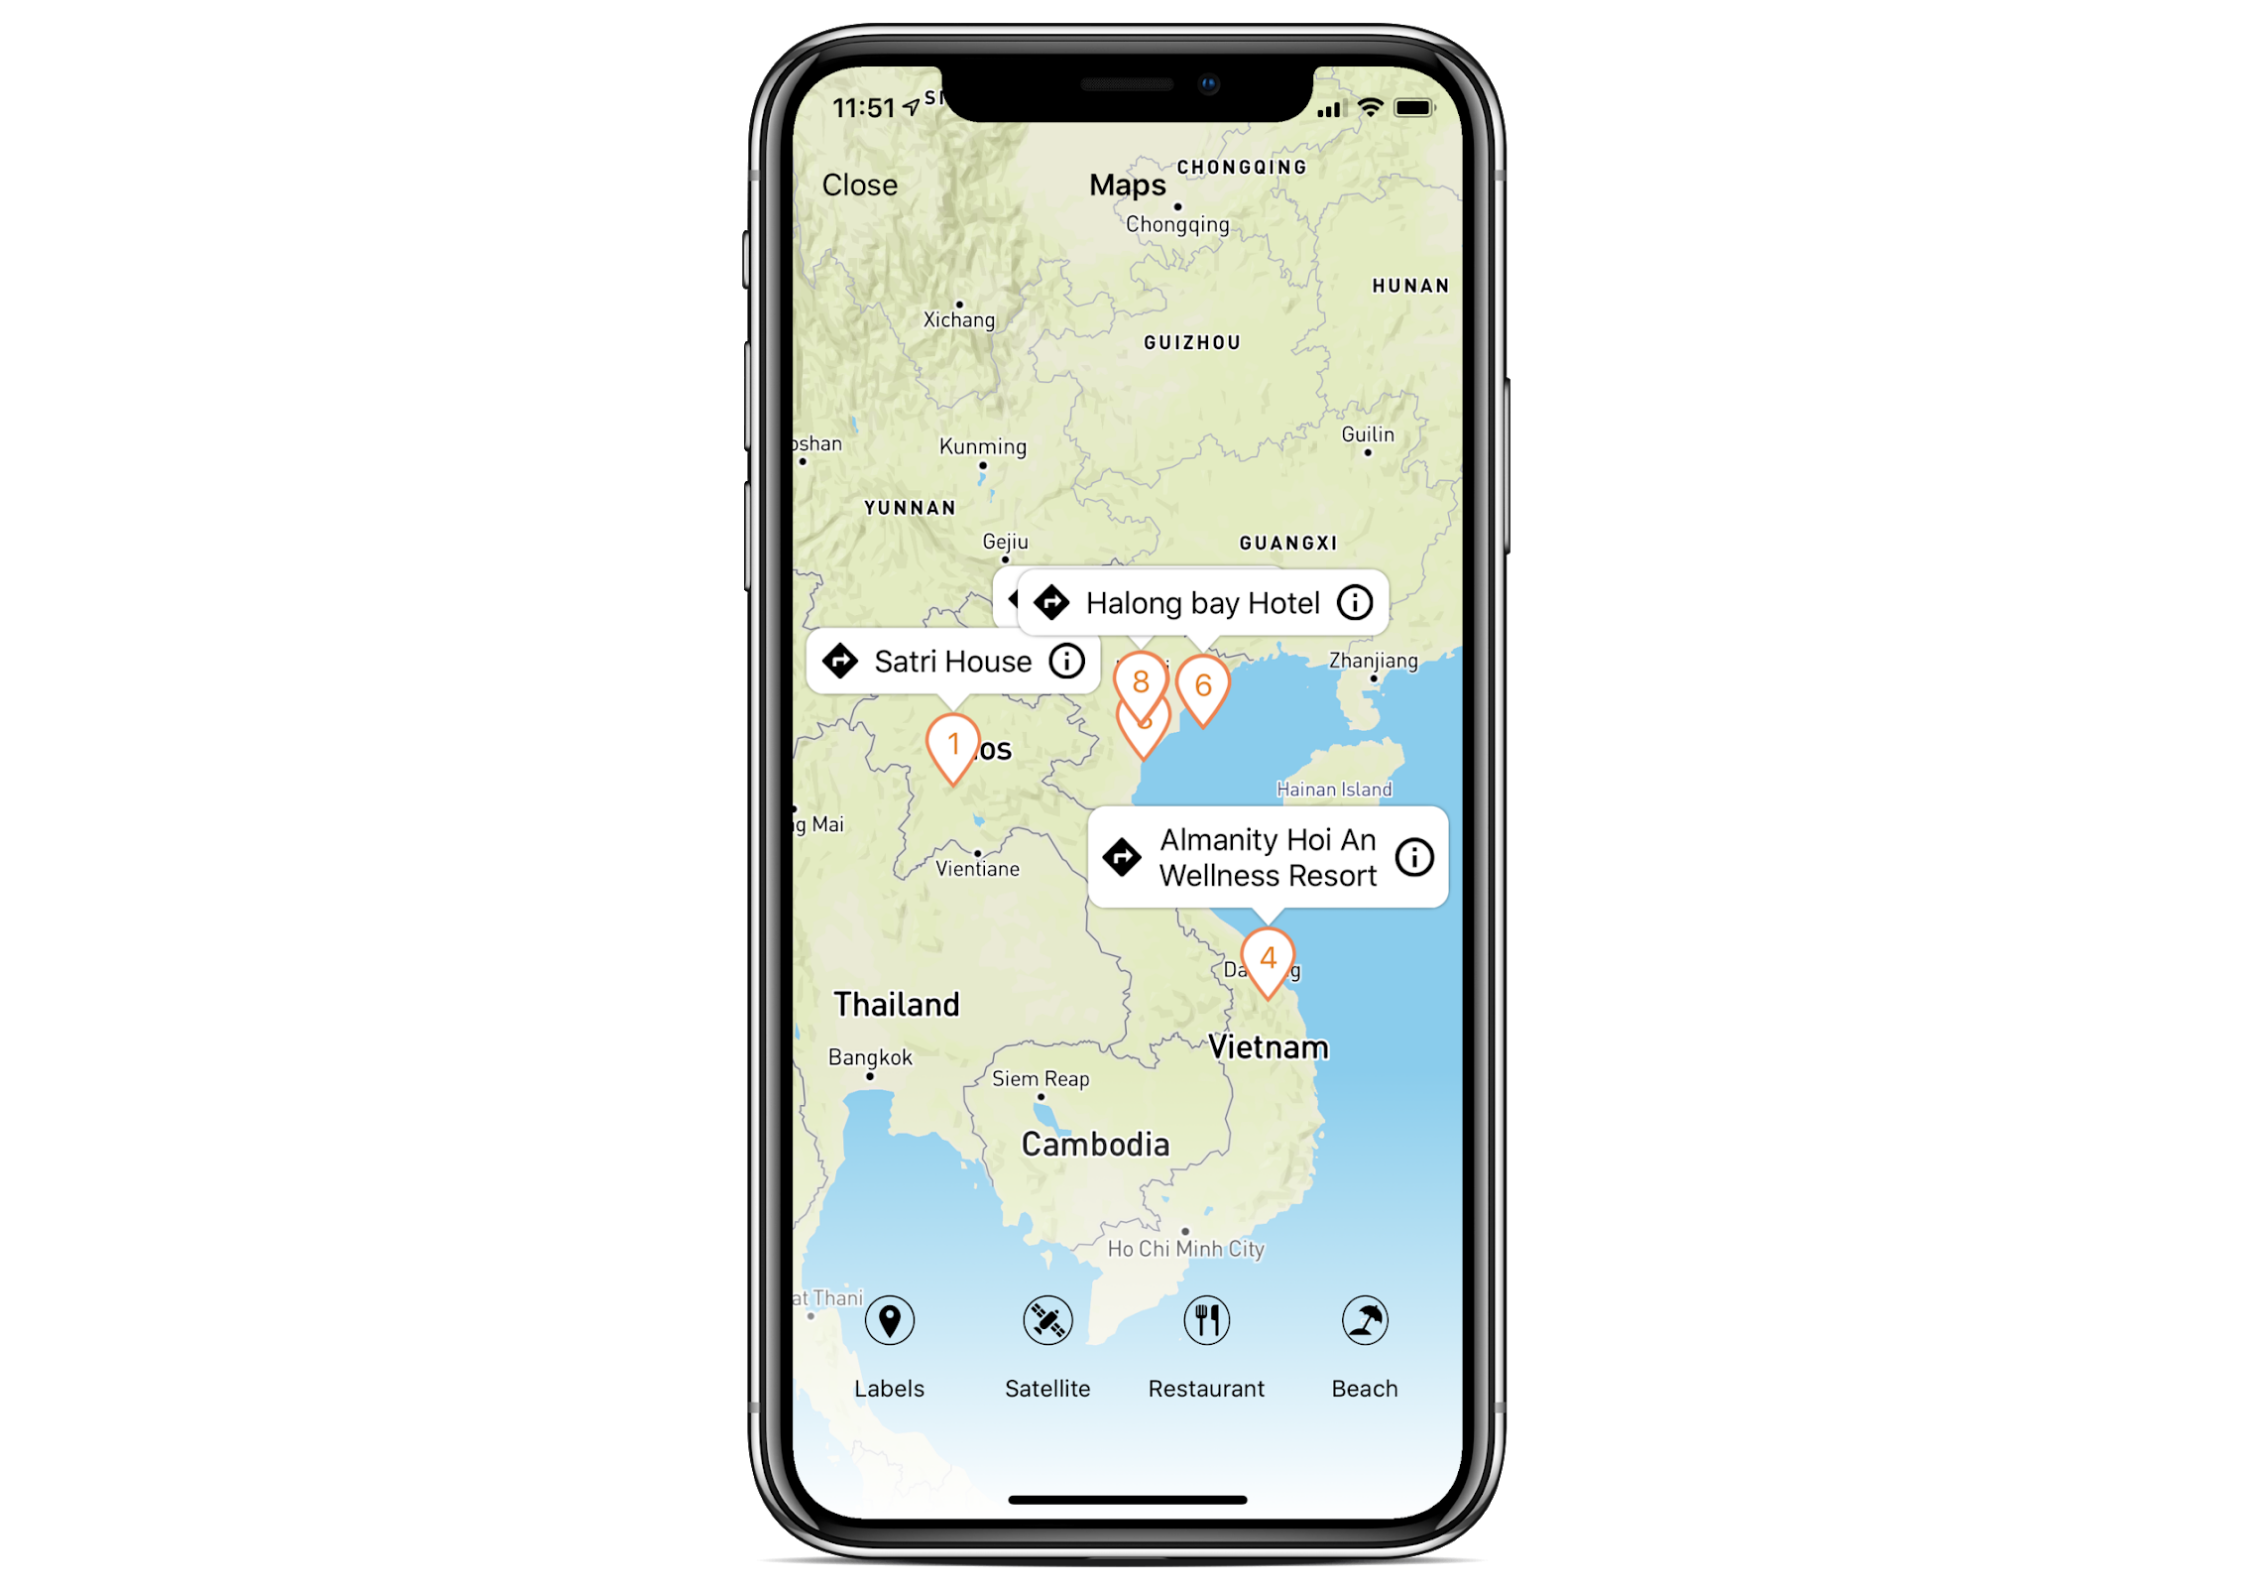
The Driving Instructions Button will take the user to an interactive driving instructions screen.
If you have any further questions about this section of Vamoos, you can reach our support team on [email protected]. Or, take a look at our video library for further support!