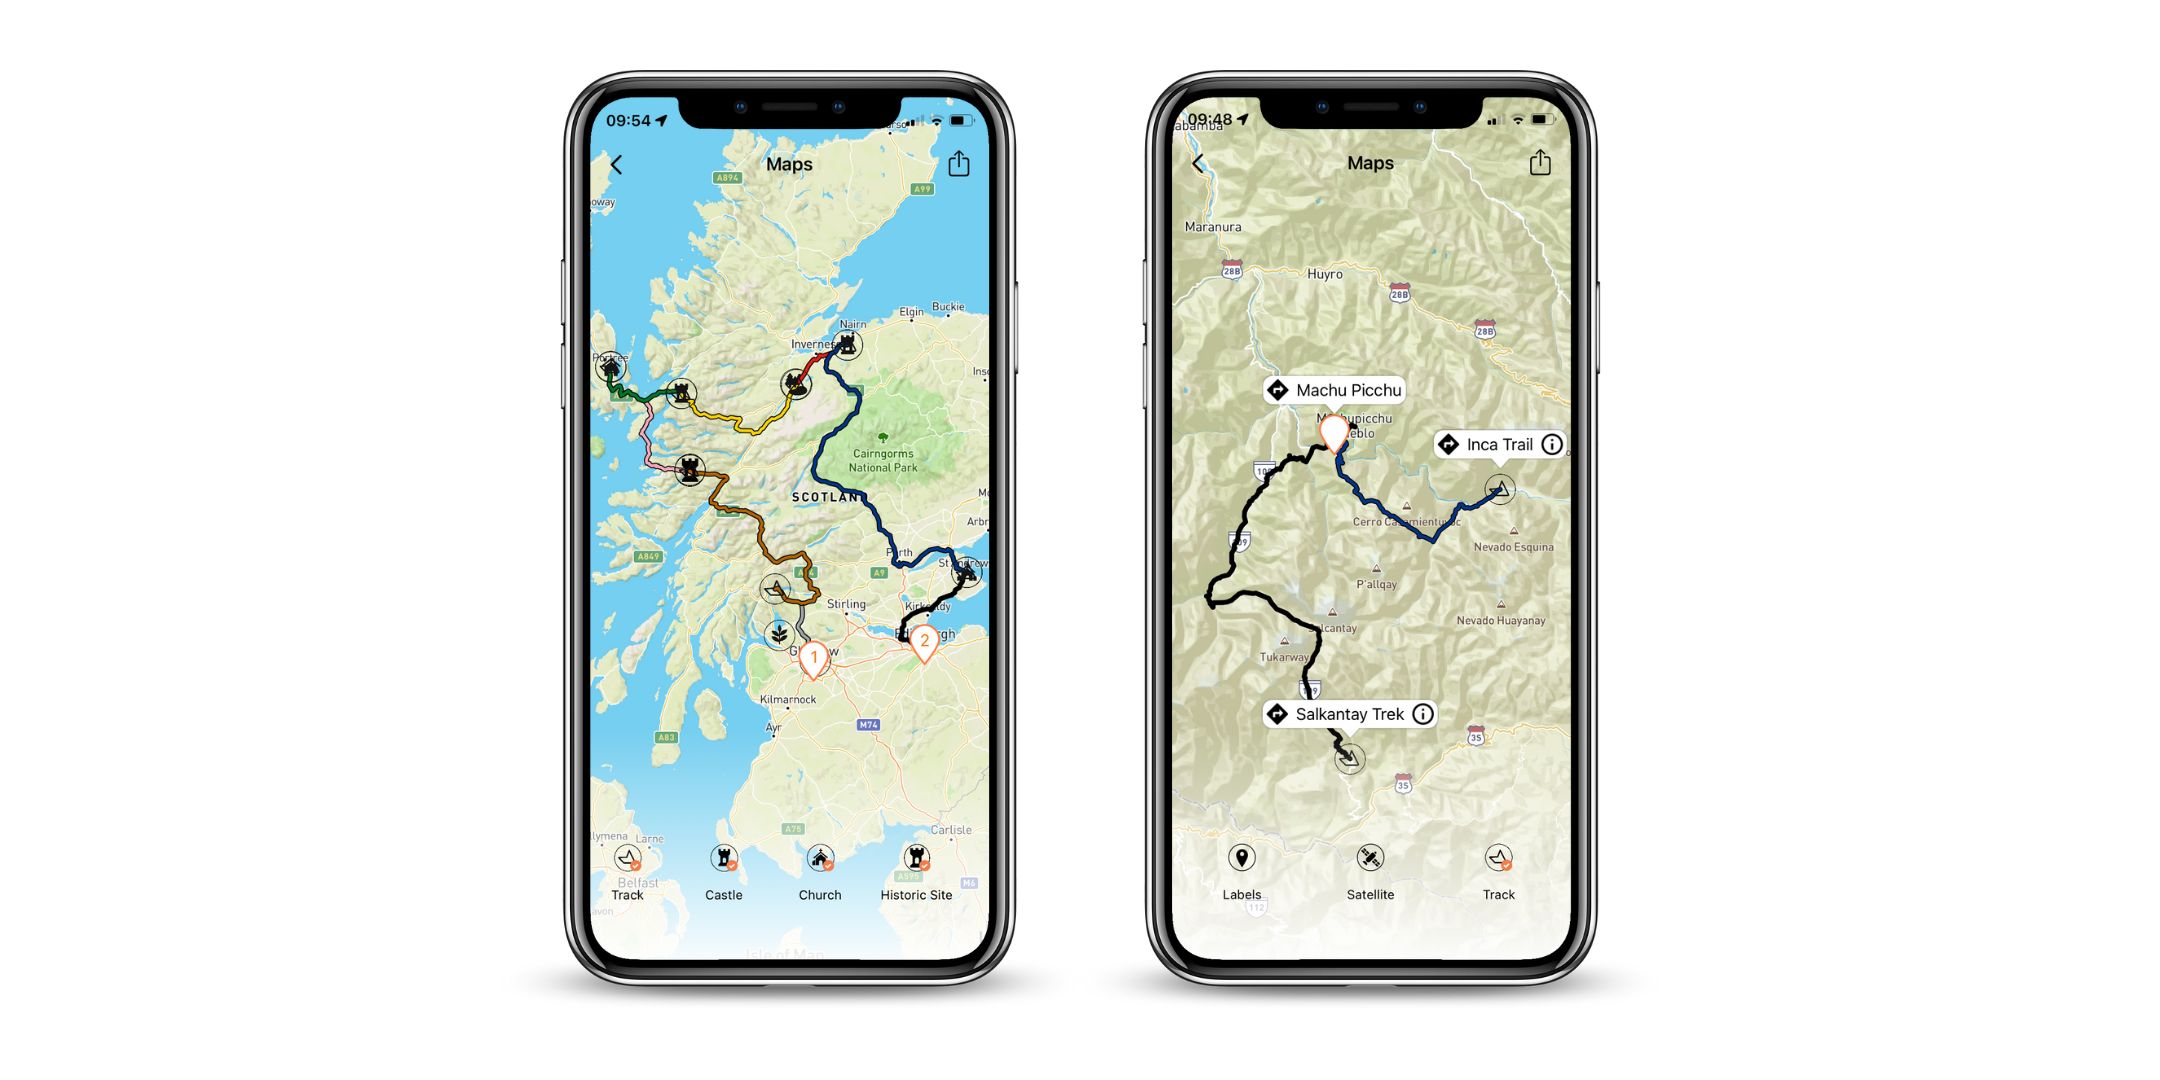
Use the GPX tracks feature in Vamoos to map out routes for your clients:
- Show your clients routes and daily excursions they will be making during their trip
- Help clients to visualise their adventures before they’ve even got to the airport
- Add points of interest along the way to showcase your local knowledge
How to add your GPX Tracks to Vamoos
Step 1 – Create your .gpx file. There are quite a few different ways to do this, so click here to review our separate guide on creating these.
Please note your .gpx file will need to be less than 10,000 points – please see the separate guide for further information about this too!

Step 2 – To add your GPX file to Vamoos, go to the Vamoos Operator Portal. Go to SHARED at the top, and select POI. Click the orange ‘Create POI’ button.
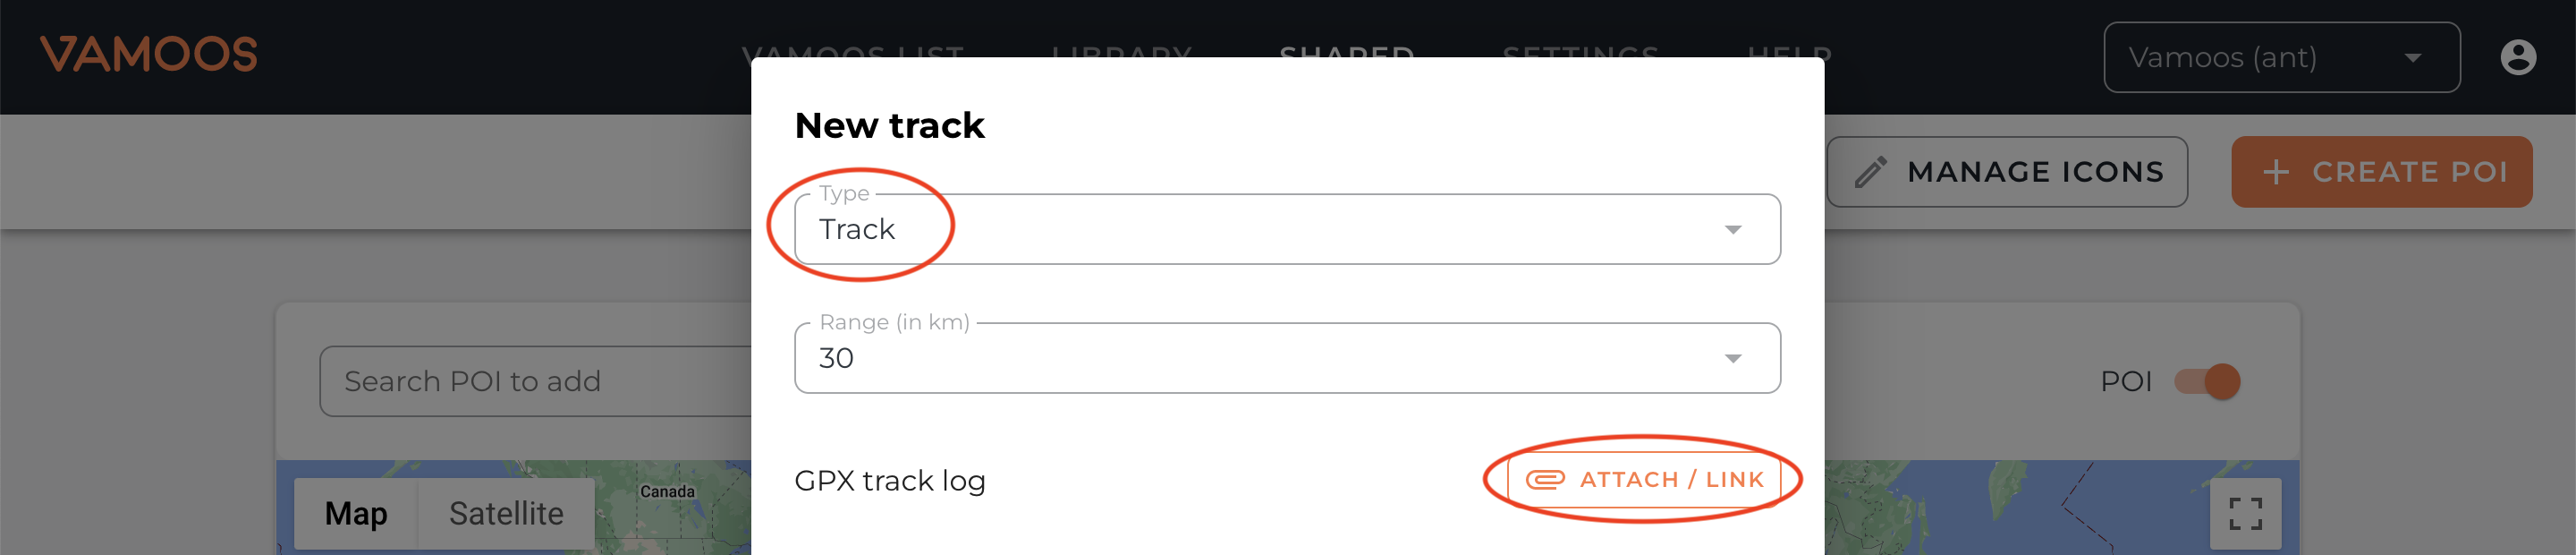
Step 3 – Change the type from ‘Point of Interest’ to ‘Track’.
Range (in km) – this is what will trigger your track to show up in your clients’ trips (e.g if you choose a range of 30km the track will show for any trips where locations are within this range)
Upload your .gpx file by clicking the ‘Attach/Link’ button and selecting your file.
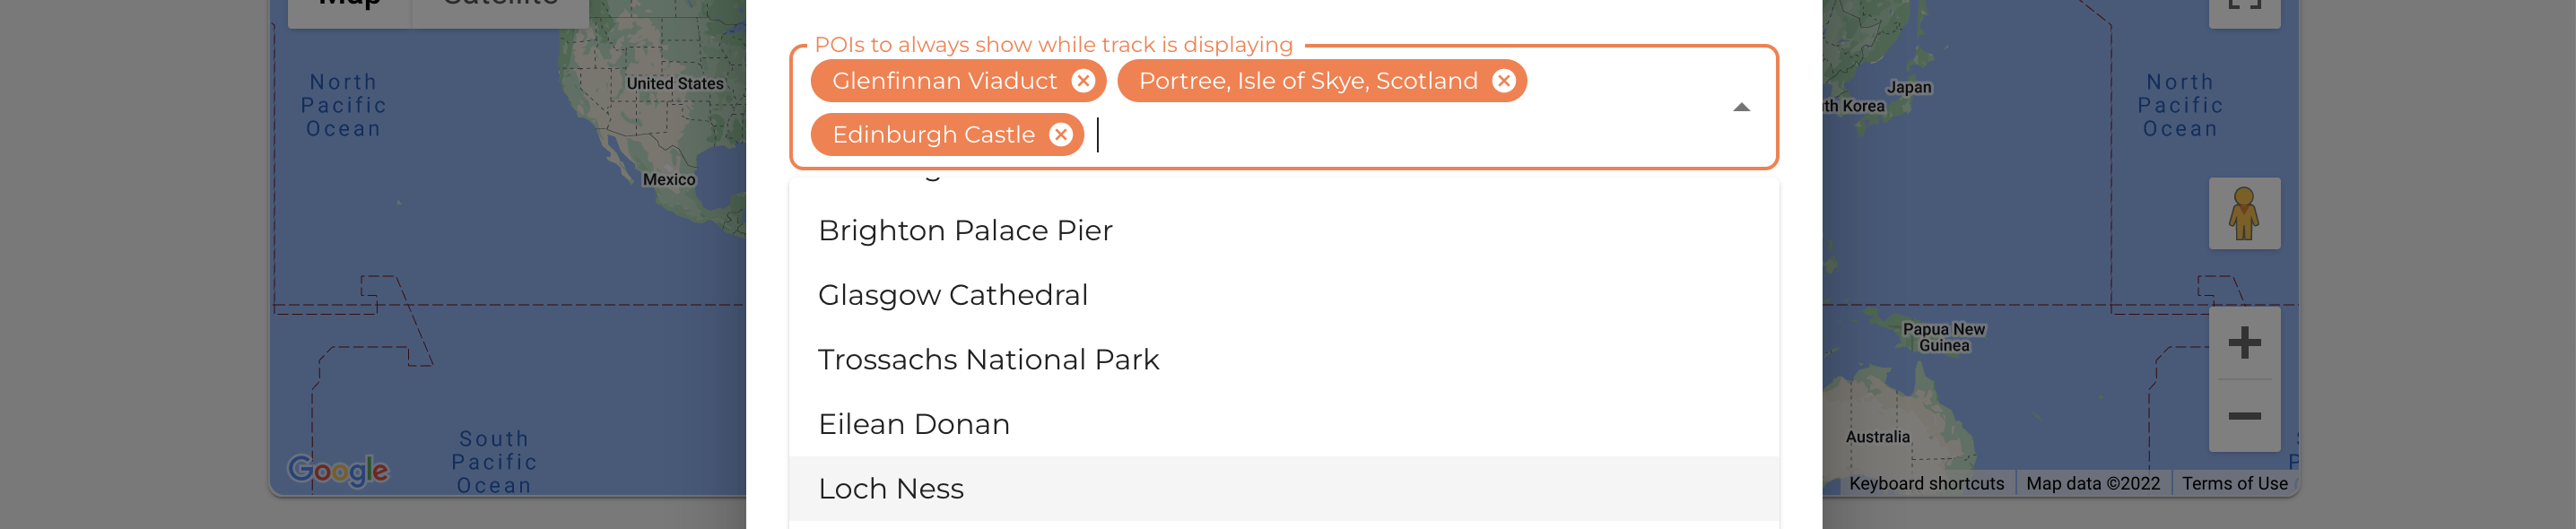
Step 4 – Select which existing POIs you’d like to show while the track is displaying. This allows you to highlight key attractions on the route for your clients.
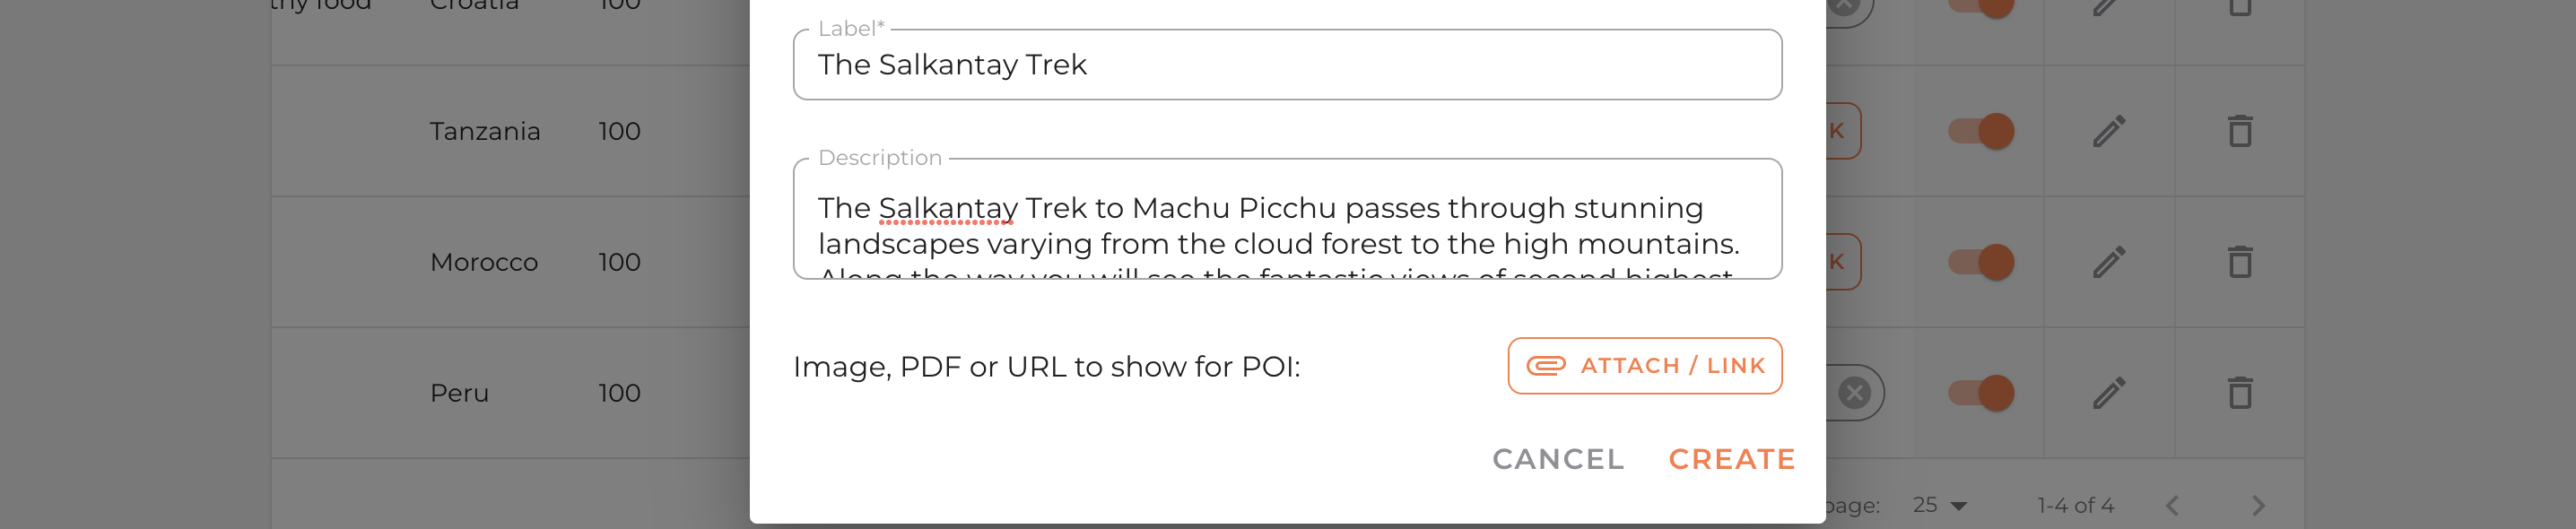
Step 5 – Add additional information about your GPX track. Add a name label and try adding a full description, an image, a PDF or a URL to personalise your tracks and add information your clients can’t find anywhere else!
Once you’ve added your additional information, press ‘Create’ and your track is now live!
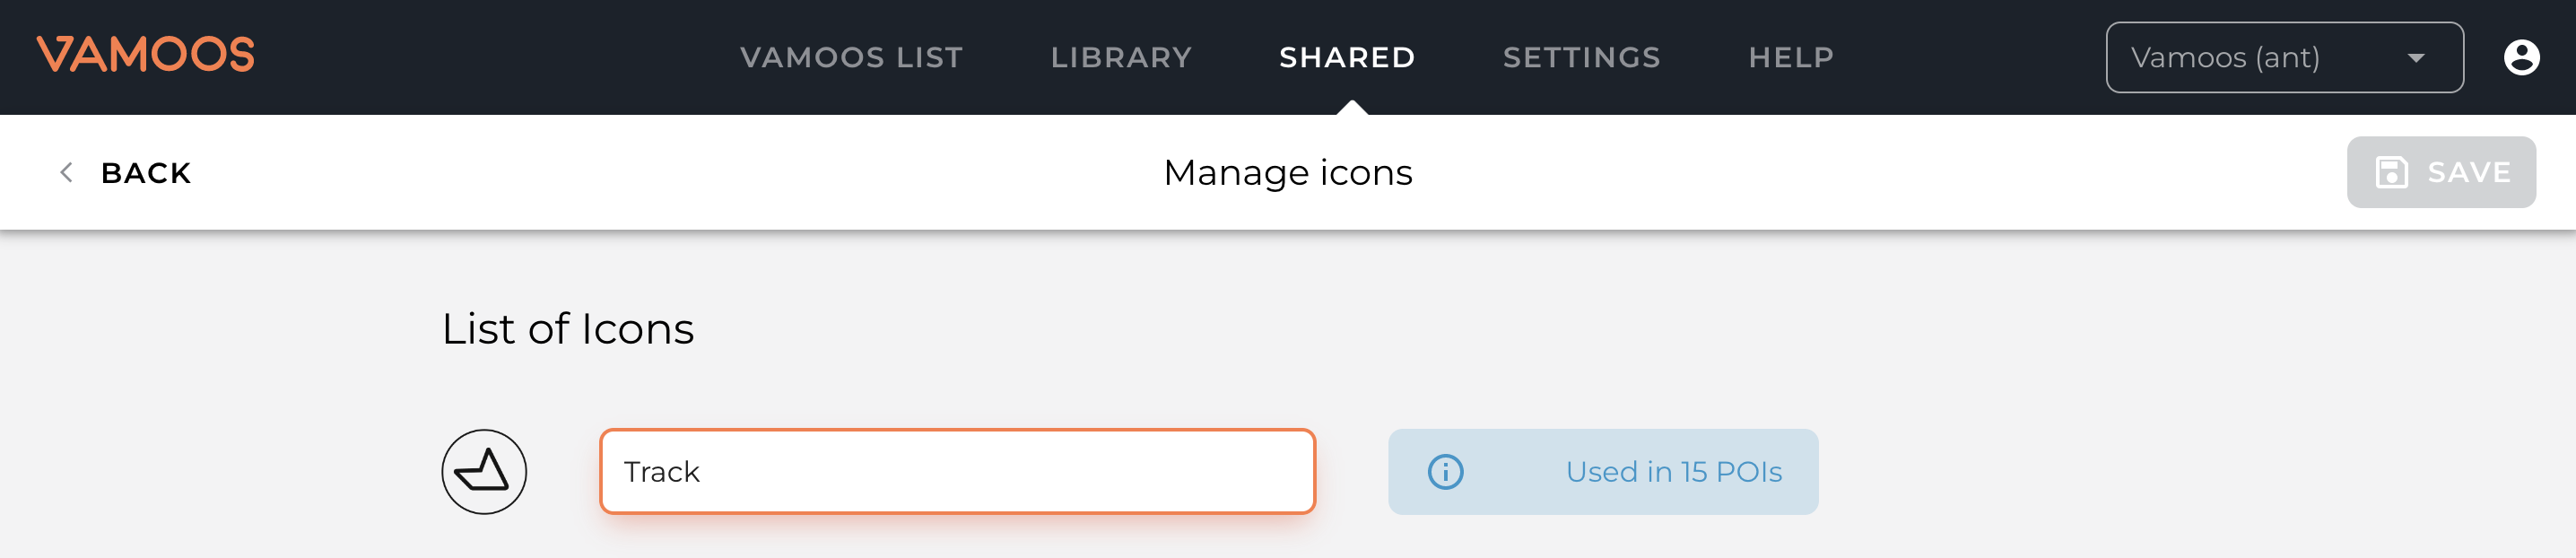
Step 6 – You can rename the title ‘Tracks’ and personalise this to the way you will be using this feature (e.g try renaming it to Hiking Routes, Driving Routes or Cycling Routes). To do this, press the ‘Manage Icons’ button (this is next to the ‘Create POI’ button).
You will then see the ‘Track’ icon option and you can rename this to the label of your choosing.
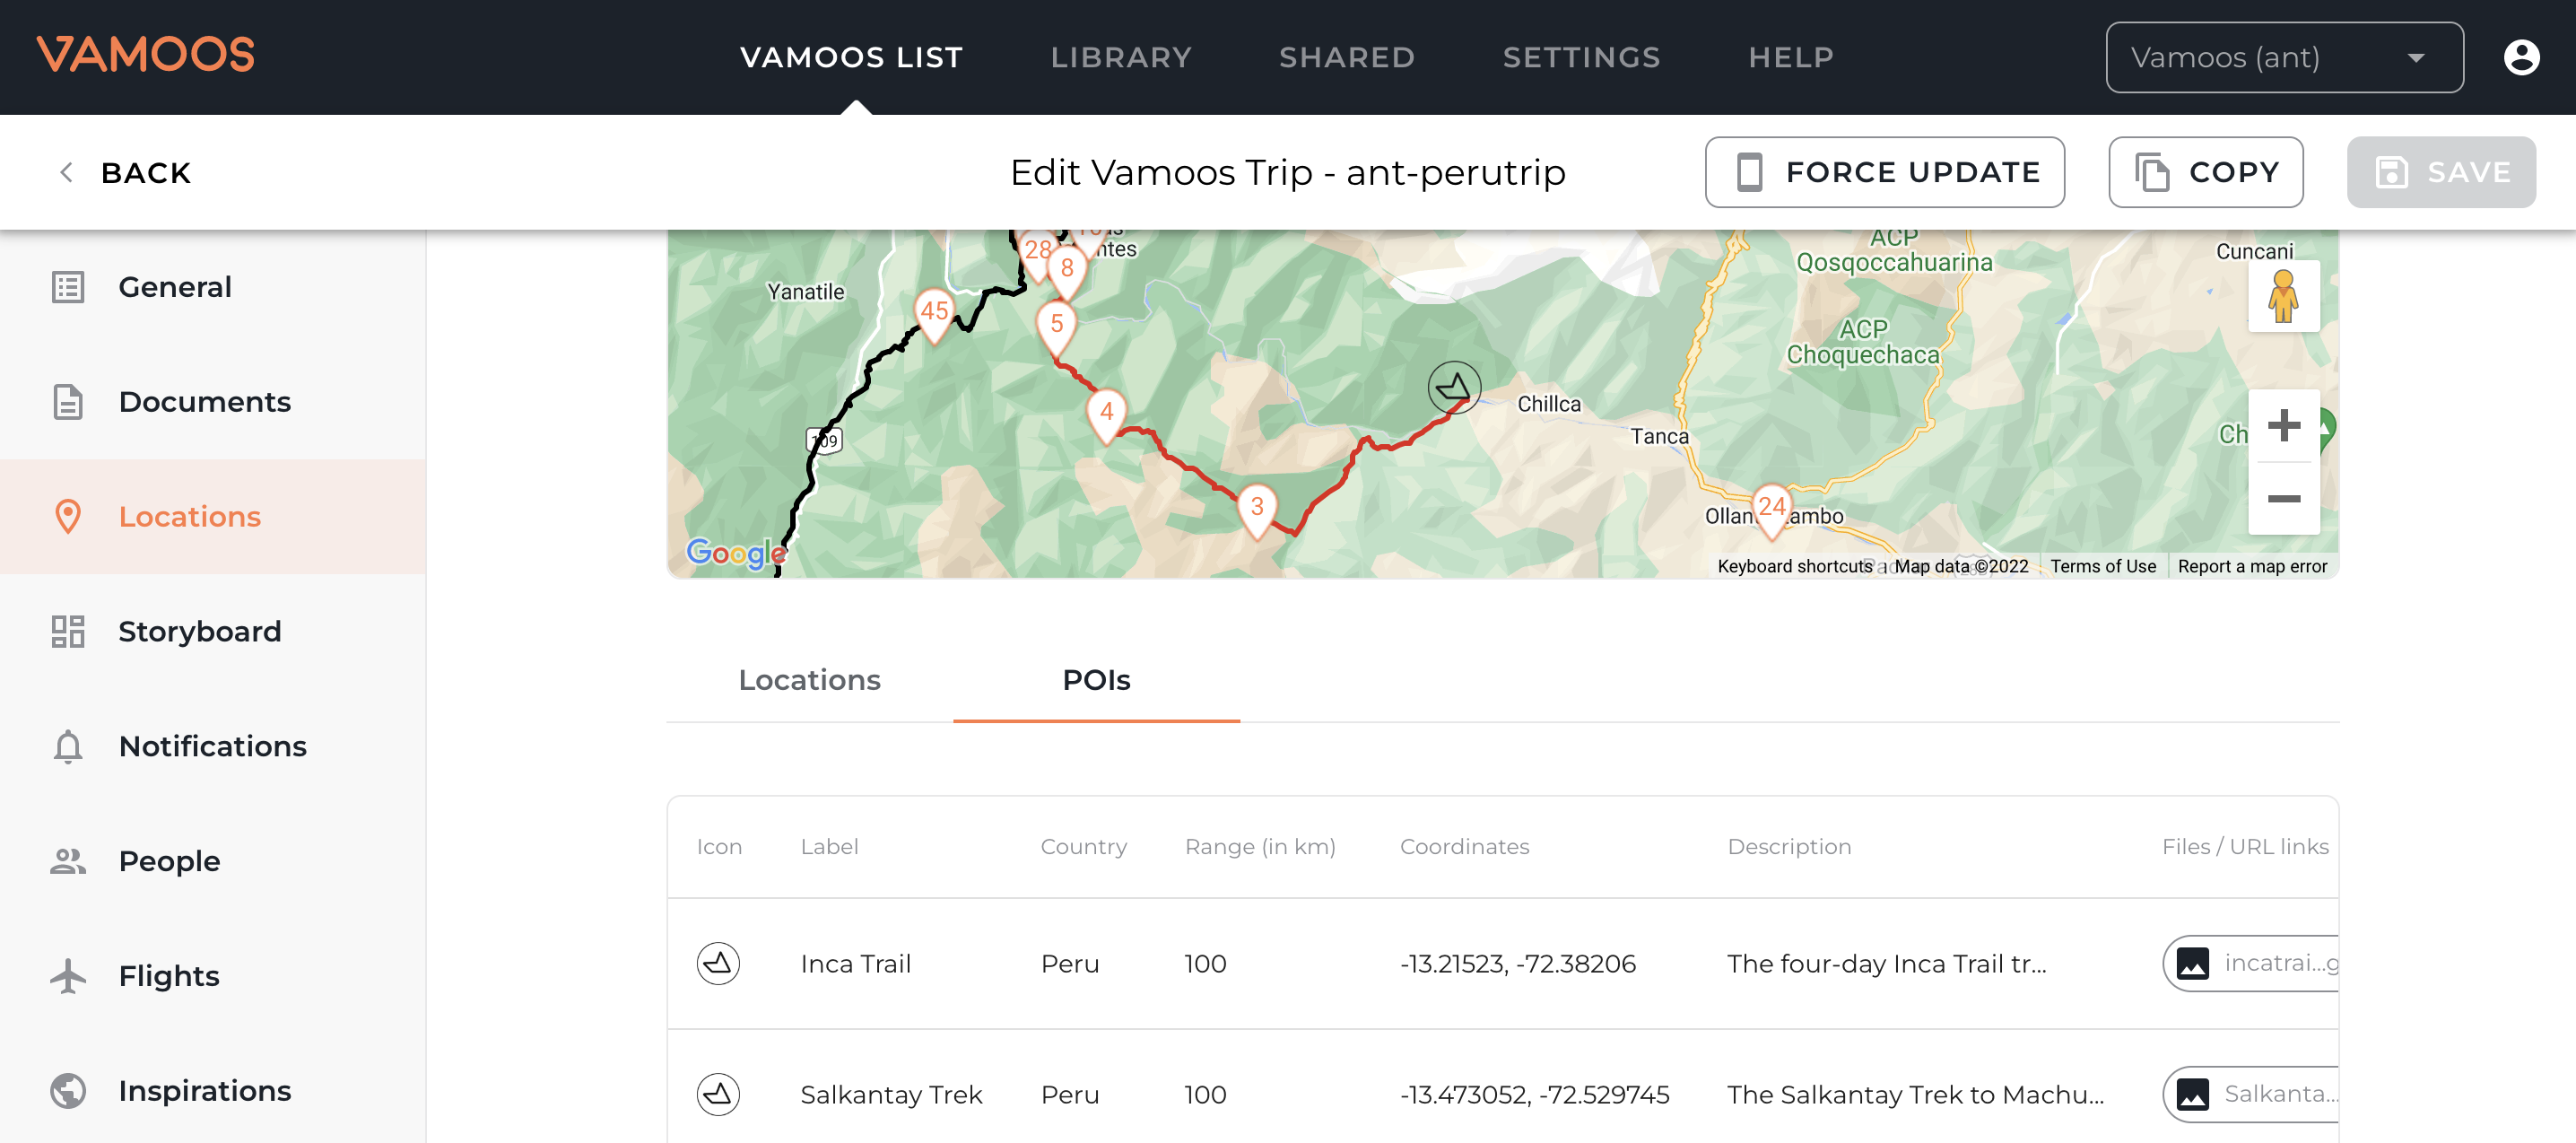
Step 7 – Finally, to check your GPX Tracks are showing within your Vamoos Trips, go to Vamoos List, and open up a trip. Navigate to the Locations tab down the left hand side and select ‘POIs’.
The GPX tracks visible that are within range of this trip will be shown here, and you can always manually turn these on/off for specific bookings by scrolling to the right hand side and using the on/off switch.
Click here for further information about how to create a GPX track file. For any other questions, don’t hesitate to email us at [email protected]